Easy Steps to Create a Rule
Creating a pricing rule in Advanced Dynamic Pricing for WooCommerce takes four steps. The rule builder lets you combine product filters, discount types, and optional conditions in any configuration — but the core flow stays the same every time. This page walks you through it quickly so you can get your first rule live in minutes.
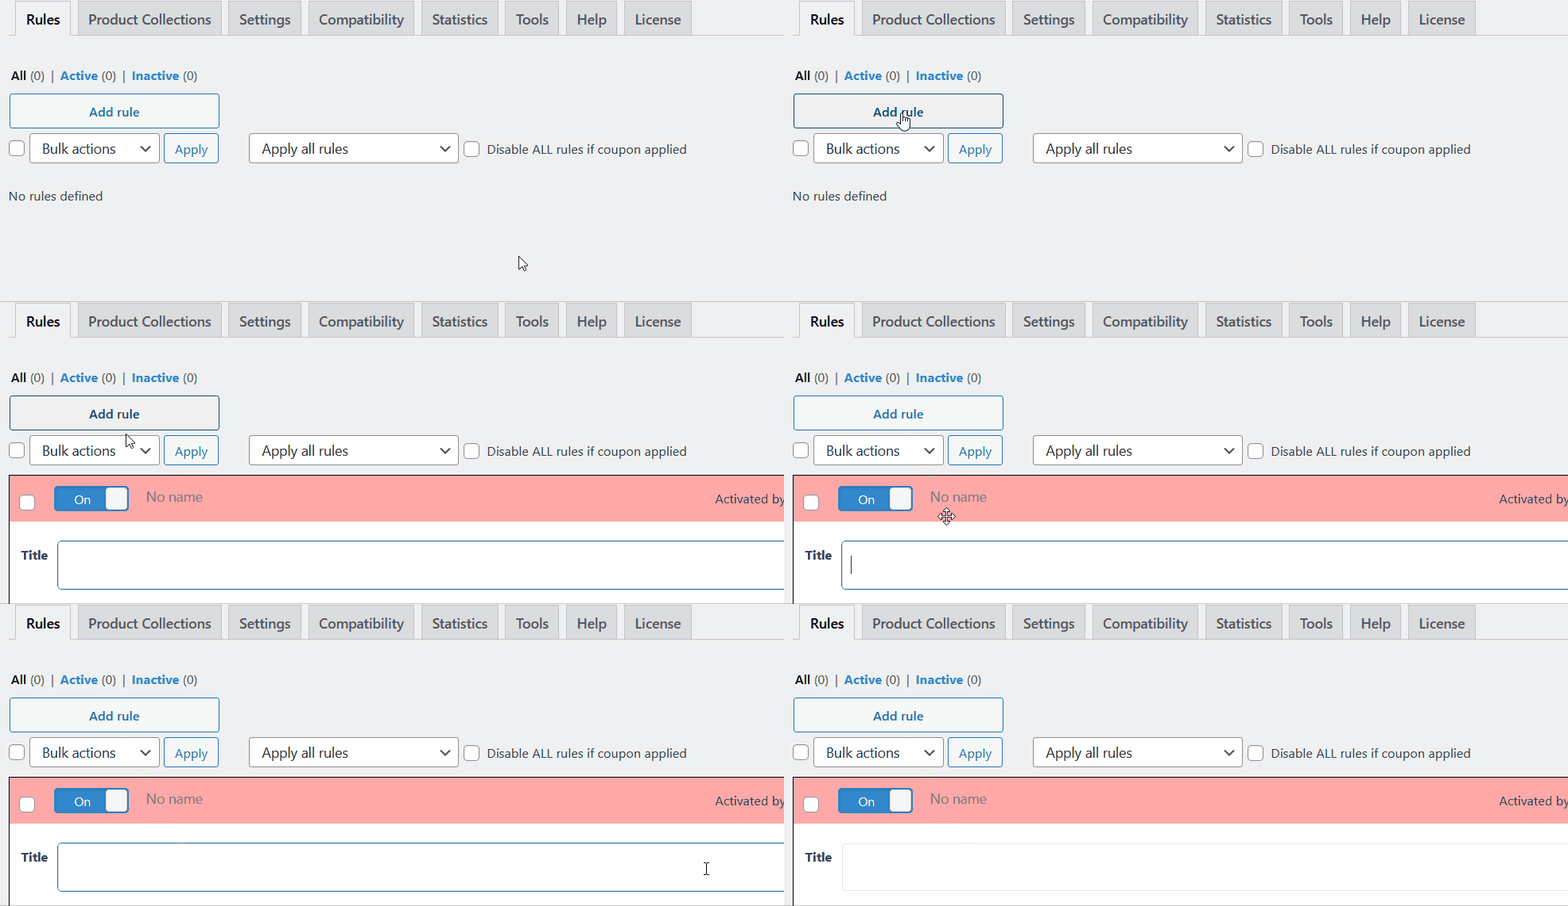
Step 1 — Click “Add Rule”
Go to Advanced Dynamic Pricing → Rules and click the Add Rule button at the top of the rules list. A new empty rule opens in the rule editor, ready to configure.
If you’d rather start from a pre-built template instead of a blank rule, click Rules Templates to browse common rule setups — bulk discounts, BOGO offers, role discounts, and more — and load one as a starting point.
Step 2 — Choose Your Discount Type
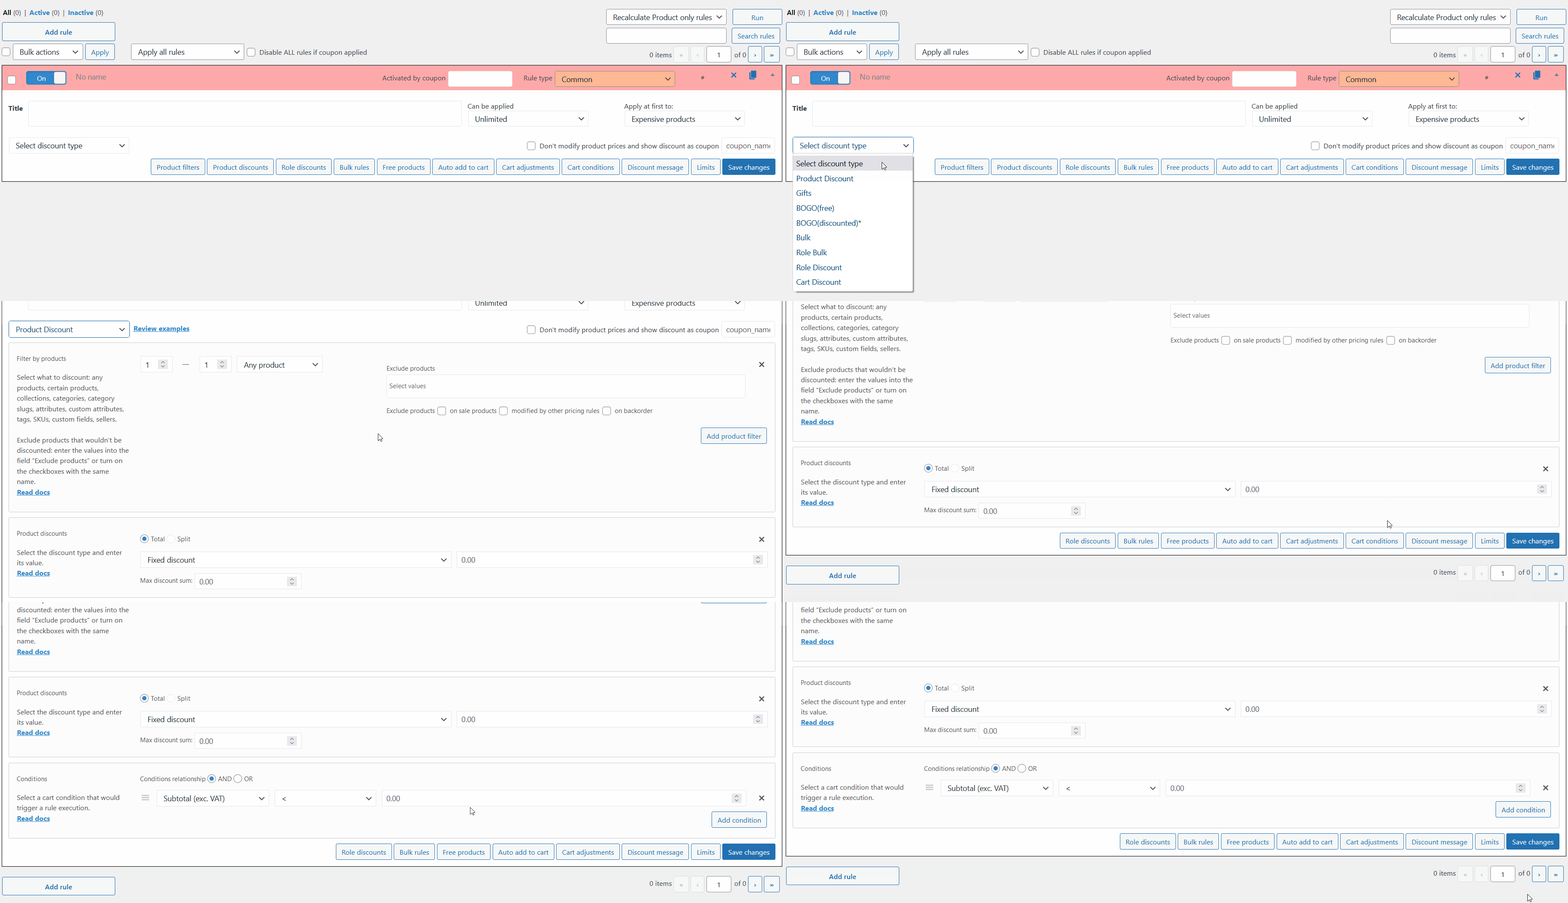
Every rule needs at least one discount section. The rule editor starts with a Product Discounts section open by default, but you can swap it or add others depending on what you want to achieve.
Click the discount type selector to choose from the available options — percentage discount, fixed discount, fixed price, bulk pricing tiers, free products, or cart/shipping adjustments. You can add multiple sections to the same rule if your promotion combines more than one discount type, for example a bulk tier alongside a free gift.
Not sure which discount type fits your use case? The Type of Rules page explains each option with examples.
Step 3 — Fill In Your Data
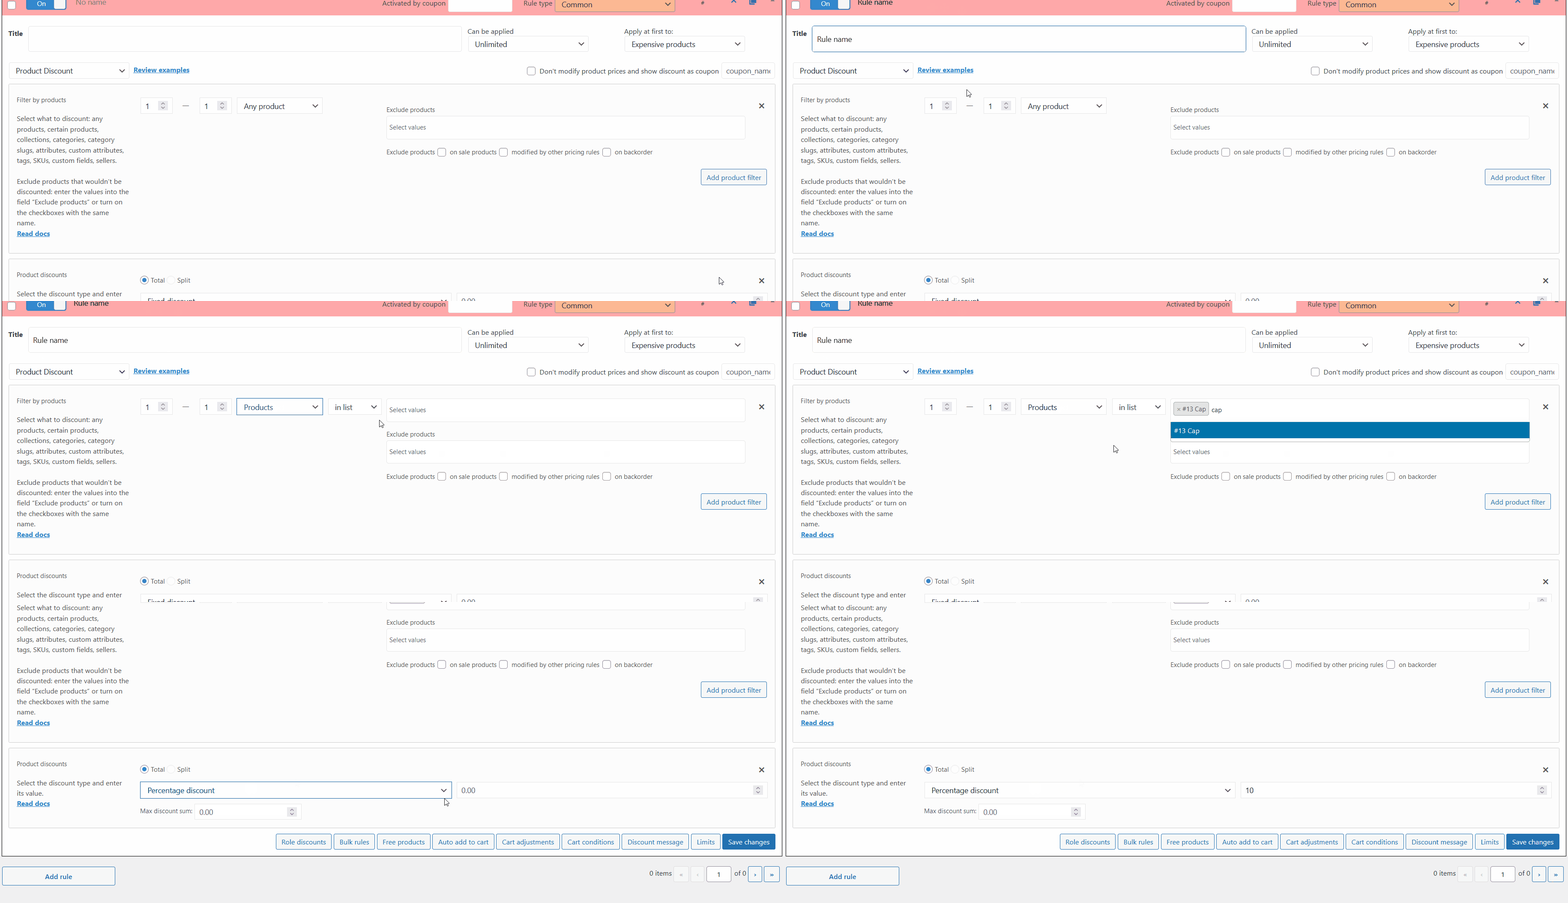
With a discount type selected, fill in the rule’s details. Every rule has three main areas to configure:
Product Filters — define which products the rule targets. You can target all products, specific products by name or SKU, entire categories, products with a certain attribute, or a saved Product Collection [PRO]. Leave this set to “Any product” to apply the rule across your entire catalogue.
Discount section — enter the discount value (percentage, amount, or fixed price) and configure any quantity tiers if you chose bulk pricing. This section changes depending on the discount type you selected in Step 2.
Cart Conditions (optional) — add conditions that must be true for the rule to fire. Common examples include a minimum cart amount, a specific customer role, a coupon code trigger, or a date range. Leave this section empty and the rule fires for all customers with no conditions attached.
Step 4 — Save the Rule
Click Save Changes at the top or bottom of the rule editor. The rule activates immediately — visit a product page or add a qualifying product to the cart to verify it fires correctly.
If the rule doesn’t apply as expected, the Debug panel shows you exactly which rules the plugin evaluated and whether they passed or failed.
What Comes Next?
This page covers the minimum steps to get a rule working. Each part of the rule editor has more options than described here — the articles below go deeper into each section:
Rules Examples — real-world rule setups you can follow step by step
Creating a Rule — detailed walkthrough of the full rule editor
Type of Rules — explanation of every available rule and discount type
Product Filters — all the ways to target products
Cart Conditions — all available condition types