Description of the export settings
The “Export now” tab has a lot of filters and settings for quick downloading orders in any of the presented formats (xls, csv, xml, json, tsv, pdf, html) in Advanced Order Export for WooCommerce plugin.
Filter orders by
Filter your orders by one of the selected variation:
Note: this filter arranges only the orders that included to the specified in the Date Range section value. For example, if you need to export only the orders for the January, they will be ordered according to this filter.

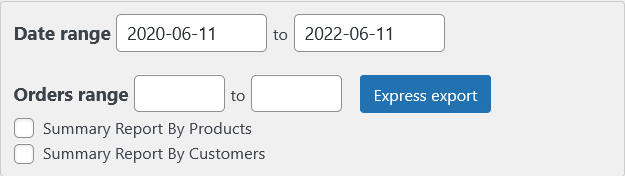
Date Range and Orders Range
Filter your orders by the range of dates with the “Date Range” section. Just choose the start date in the first date picker and the end date in the second date picker.
Filter orders by the orders ID (not order number) using “Orders Range” section. Input the order ID’s range into the corresponding text boxes.
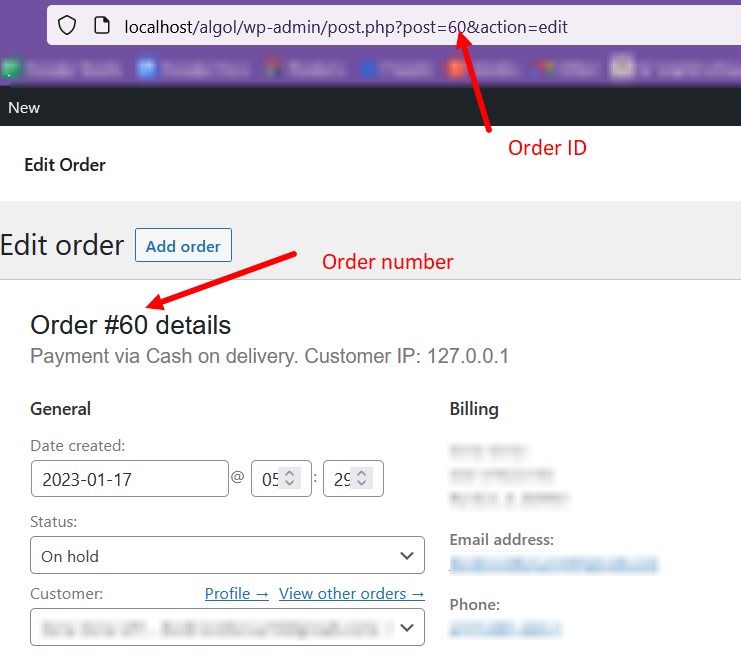
Note: Order ID and Order number are the same in the most cases. Find your Order ID as a part of order URL, and your Order number on the order page:
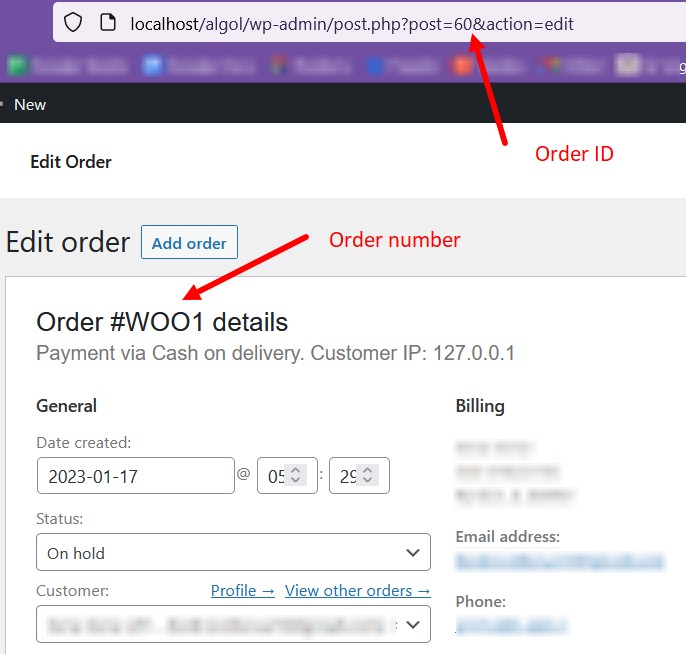
But if you install some plugins that generate order numbers, you will see the difference between Order ID and Order number:
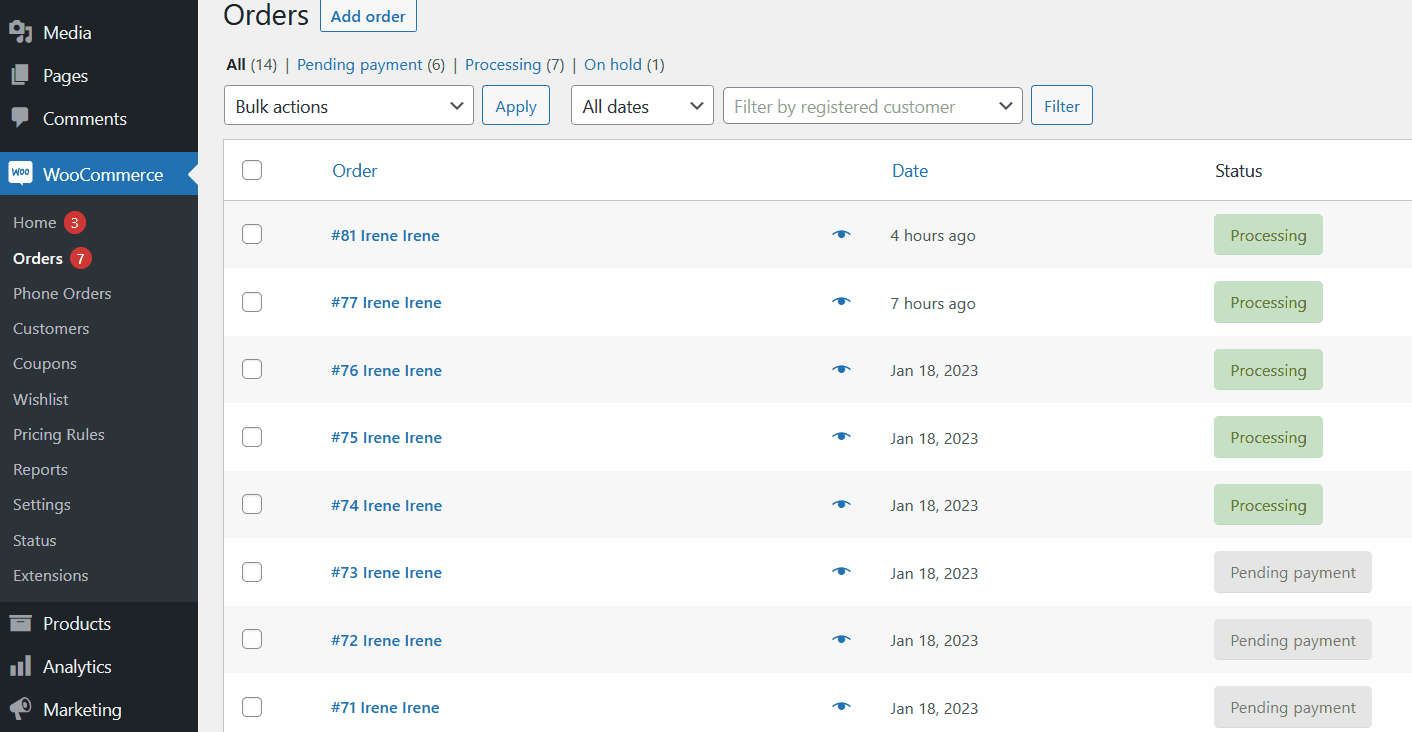
Or you can find an Order ID at the left bottom corner of the browser, hovering on the order name. Look at the gif below:
Advanced Order Export plugin uses the Order ID in the filter “Orders Range”.
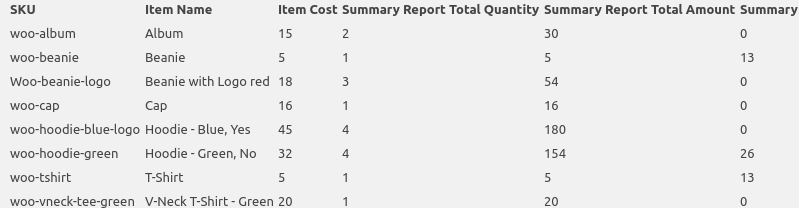
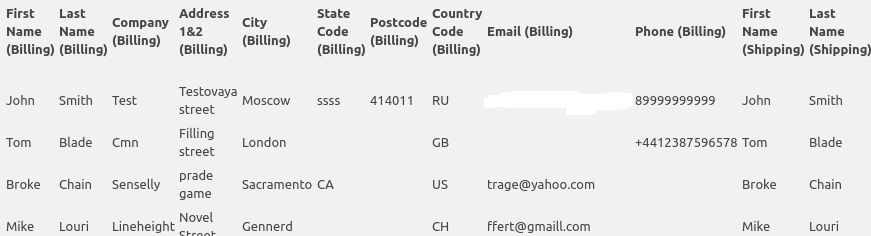
Summary Reports
There are 2 types of summary reports available:
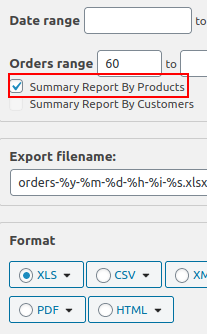
Note: you can only choose one of the summary report in one time: either Summary Report by Products or Summary Report by Customers.
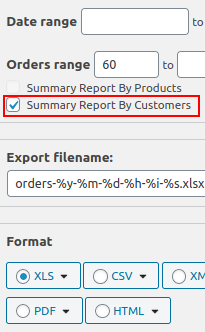
Note: summary reports are not available in XML and JSON formats.
Sort Orders by
Choose order sorting of your report.

There are 2 drop-downs:
Express export
To download an express report, fill in the required fields and click the “Express export” button.

If there are different types of products in the order, each product of the selected order will be displayed on a separate line in the report.

Export Filename
Make a filename more detailed using available tags:
Tags for specifying date and time:
%d – current day;
%m – current month;
%y – current year;
%h – current hour;
%i – current minute;
%s – current second;
{from_date} and {to_date} – values of the Date Range fields.

Tags for specifying the order id:
%order_id or %orderid or %id – the last order ID in the report;
Note: To download a report with these tags, click “Export [w/o progressbar]”

Tag for specifying the order number: {order_number}.
Note: To download a report using this tag, click “Export [w/o progressbar]”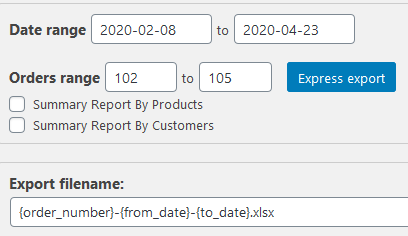

Preview, Save settings, Export buttons
he “Settings” section has a group of the system buttons below all the section.
Preview button. Click to preview your exported order.


Change the required number of elements displaying on the data preview window using the “Preview size” section. Available value: 5, 10, 25, 50 strings.

If you selected the XML/JSON report format, the “Preview” will display the hierarchy of the “Products” and “Coupons” fields.
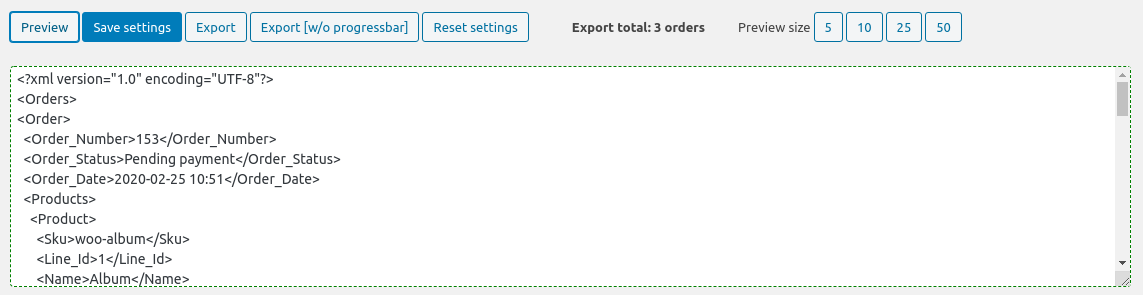
Save settings button. Click to save the data.

Export and Export [w/o progressbar] buttons. Click to export your order to your PC.

Reset settings button. Click to reset all settings to default values.
Save as profile
Using Advanced Order Export PRO plugin, you can save report settings to your own profile. A detailed description of the “Export now” tab can be found here.
To save a new export profile, click on the “Save as profile” button.

The description of the “Profiles” tab is available in the Interface of the “Profiles” tab.
Advanced Order Export for WooCommerce gives you many options. Take 10 minutes to understand each one. Your future self will thank you when exports work perfectly every time.