Adding a “Zapier” account
How to link the Advanced Order Export For WooCommerce account with the “Zapier” service:
1) Create a new job (scheduled OR status change), select output mode at tab “Zapier”, marked the parameter “As multiple entries (repeated for each item)”. Press “Save Settings”.

2) To create a free account, follow the link.
3) Sign in via Google/Facebook services or enter another email address, add first and last names, and click the “Get started free” button.
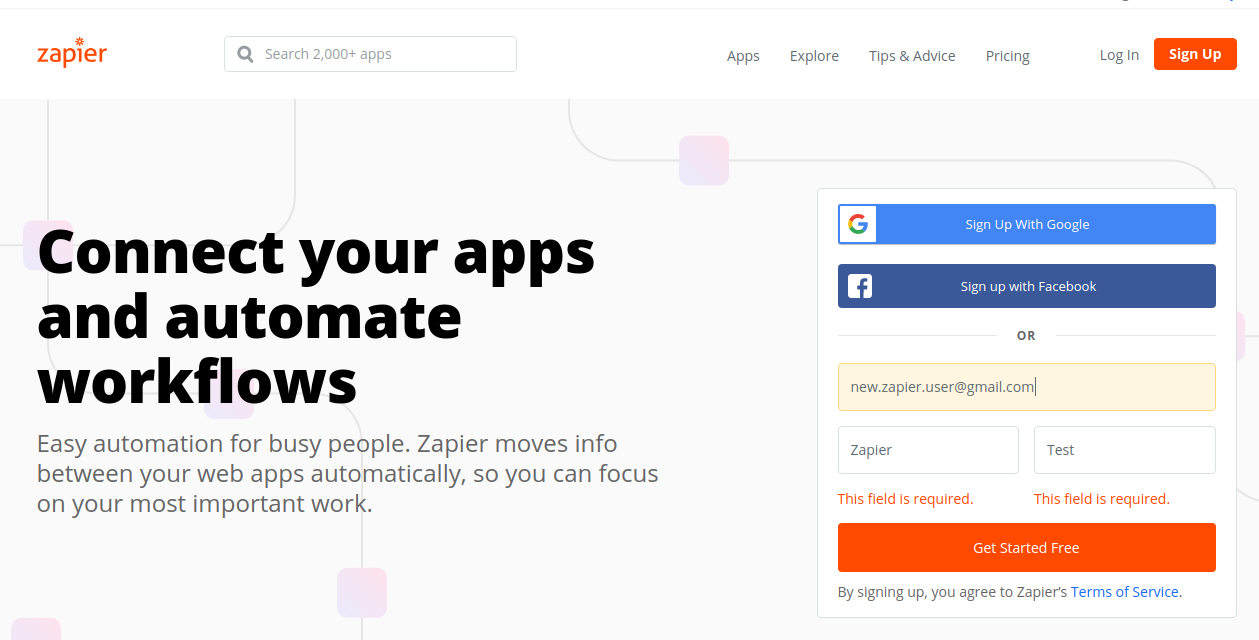
4) Then enter your password and click the “Sign up” button.

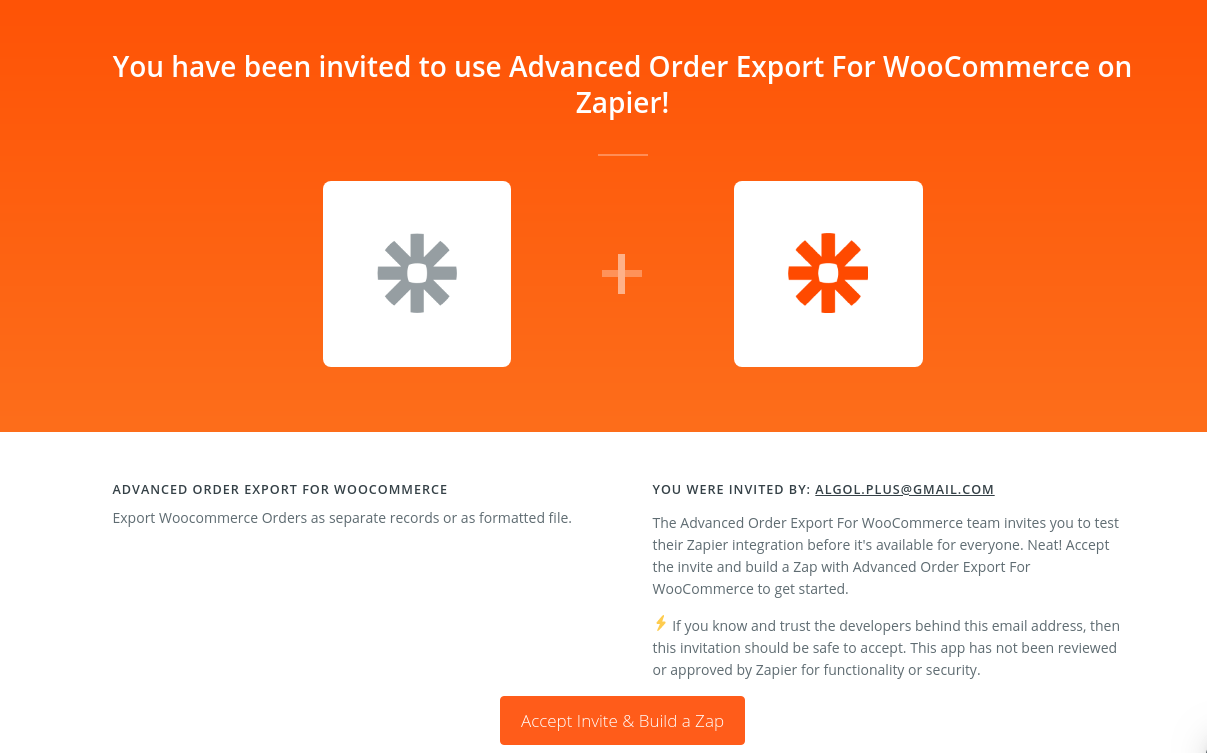
5) After that, follow the link.
6) Click the “Accept Invite & Build a Zap” button in the opened window.
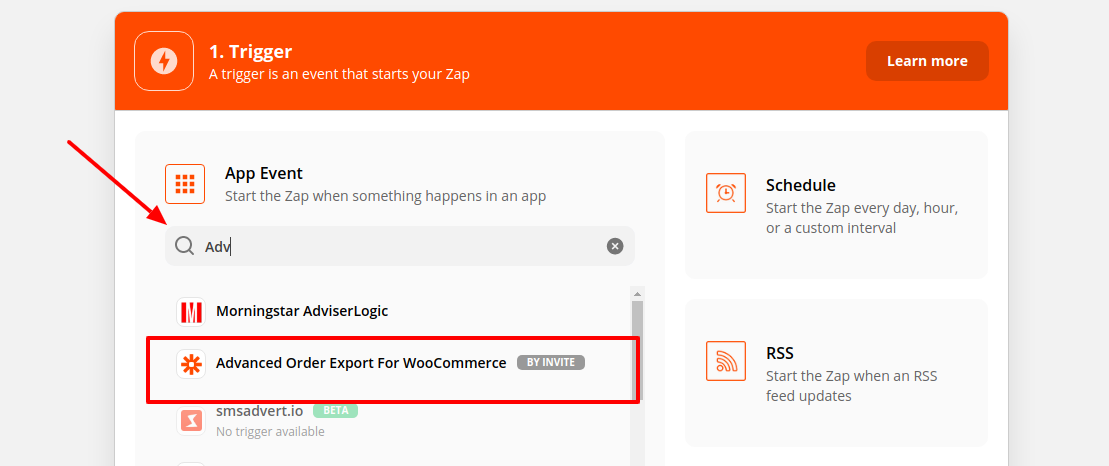
Click “Make Zap”, type “Adv” , select our app and select trigger event “New Export”
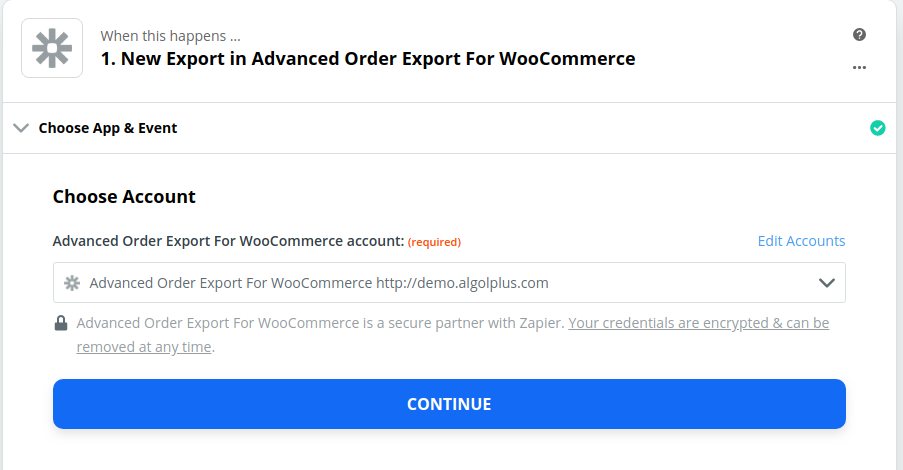
7) Click “Continue”

and “Sign in to Advanced Order Export For WooCommerce”.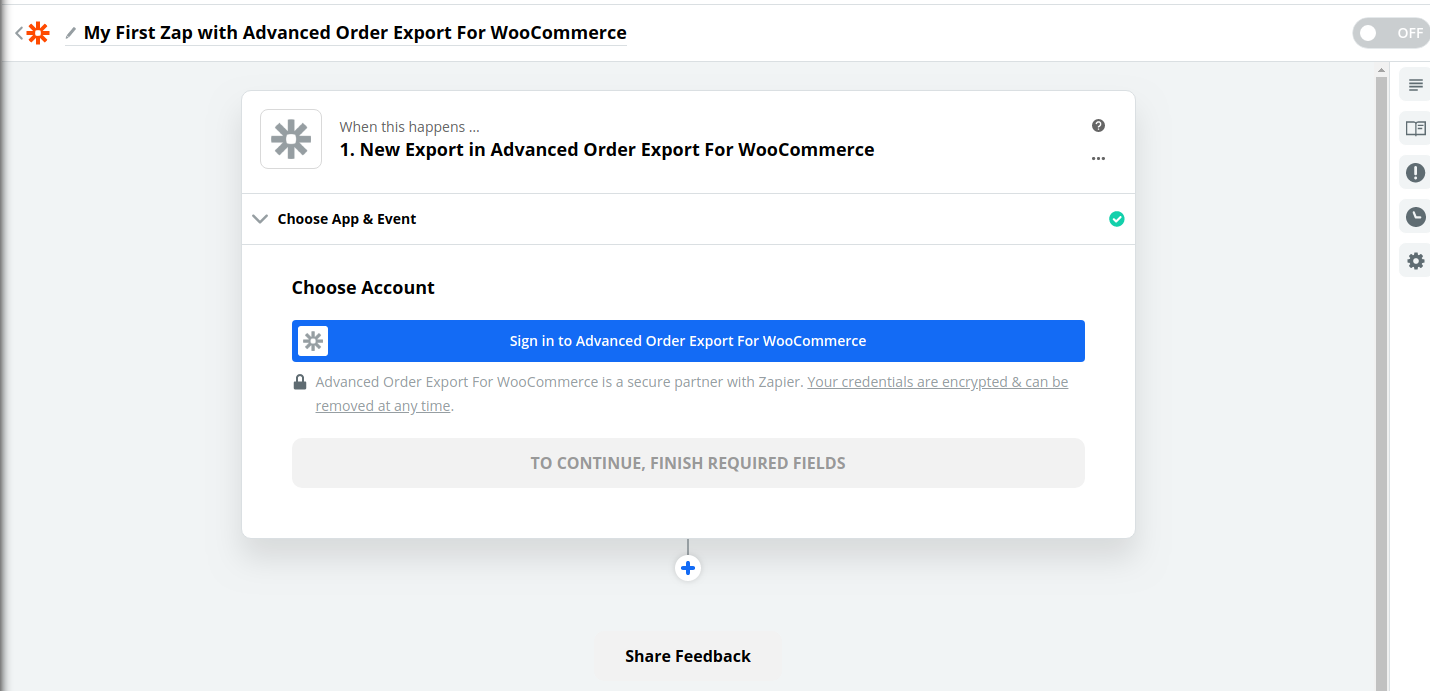
8) You will see a pop-up window with the following settings.
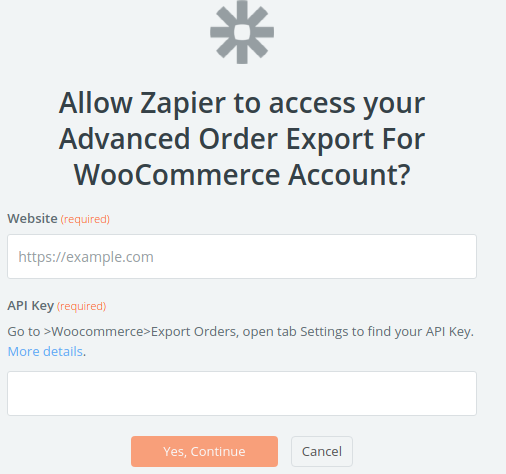
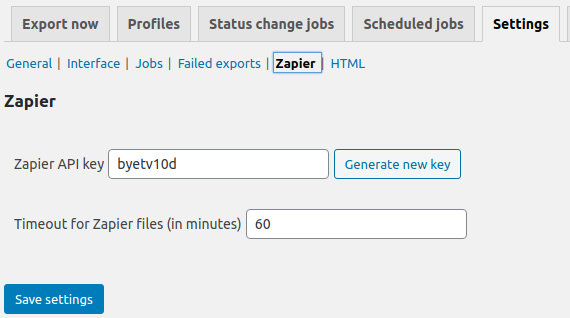
9) Go to your website in the section “WooCommerce” – “Export orders” – “Settings” – “Zapier” , click “Generate new key” and click “Save Settings”.
10) Enter the address of your website and the API Key that you just generated. Click “Yes, Continue”.
11) Great! You have linked the Advanced Order Export For WooCommerce account to the Zapier service. Click the “Continue” button.
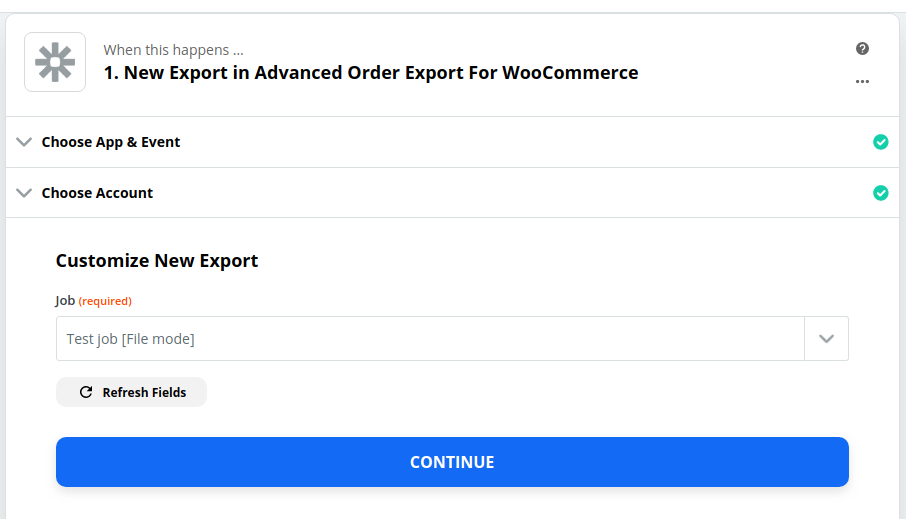
12) Select the job you’ve created at the first step and click “Continue”.
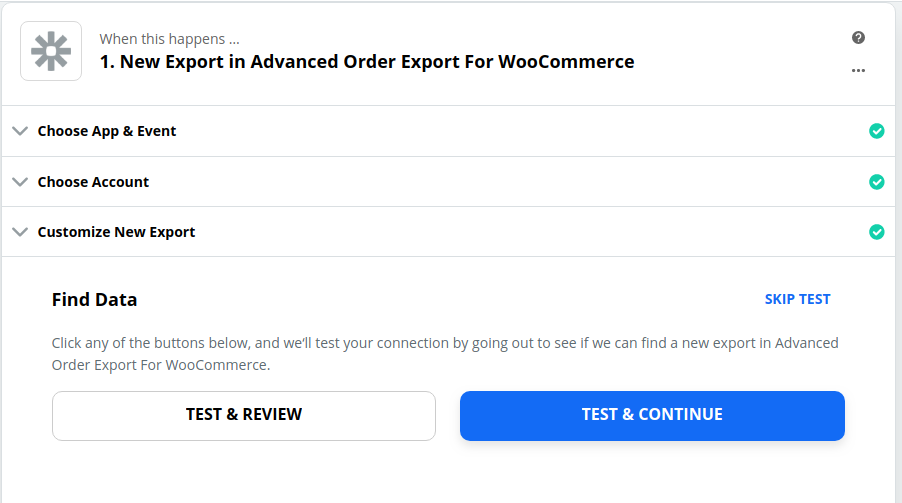
13) Click the “Test & Continue” button.
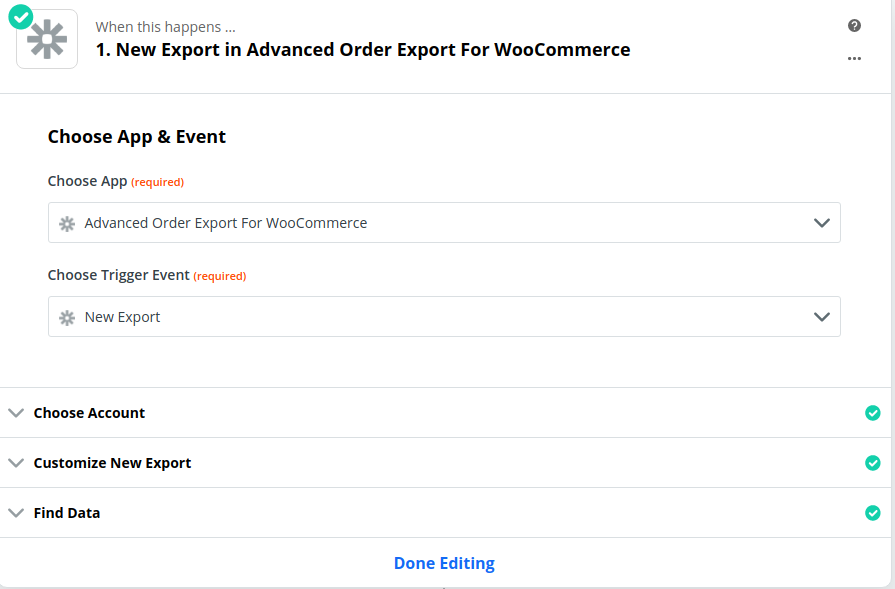
14) All binding steps were completed successfully. Click on the “Done Editing” button.
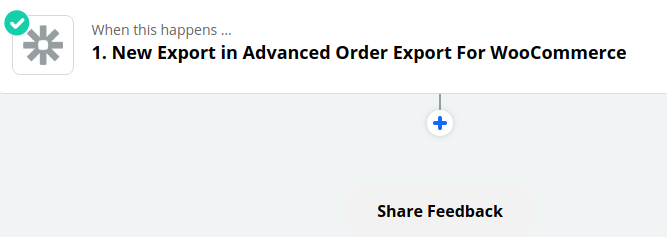
15) Click on ” + ” sign and add the service with which you want to sync the Zapier service.
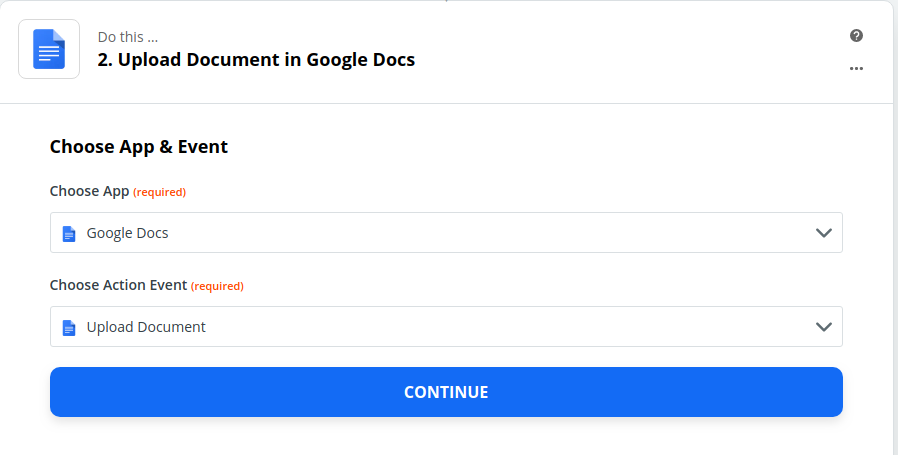
E.g., the Google Docs app. Select action, e.g.,”Upload Document”. Click “Continue”.
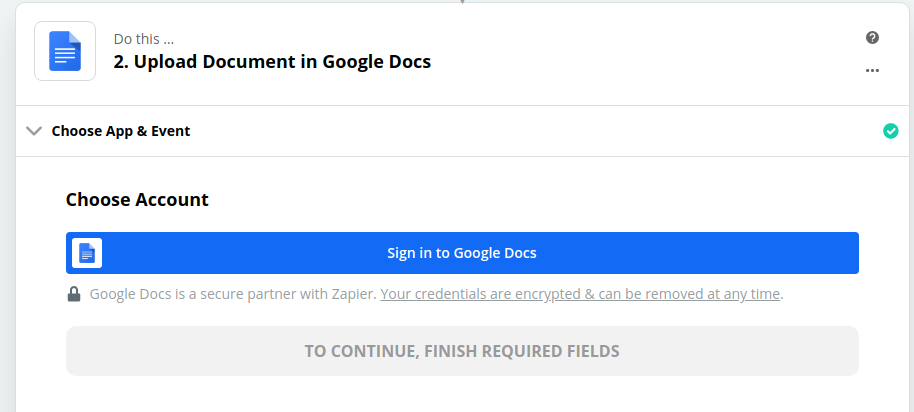
16) Select an account to log in to the service. In this case, it is Google.
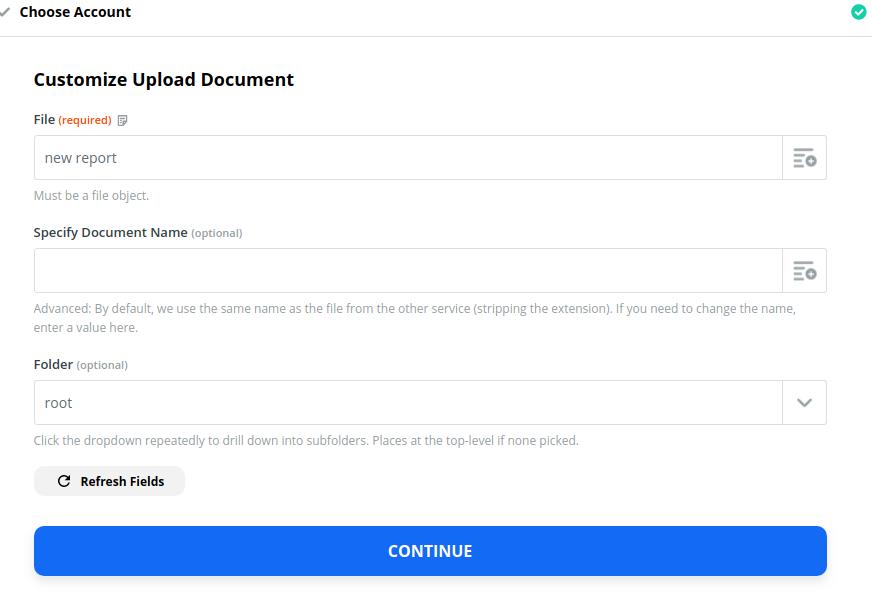
17) Enter the necessary settings for the document and click “Continue”.
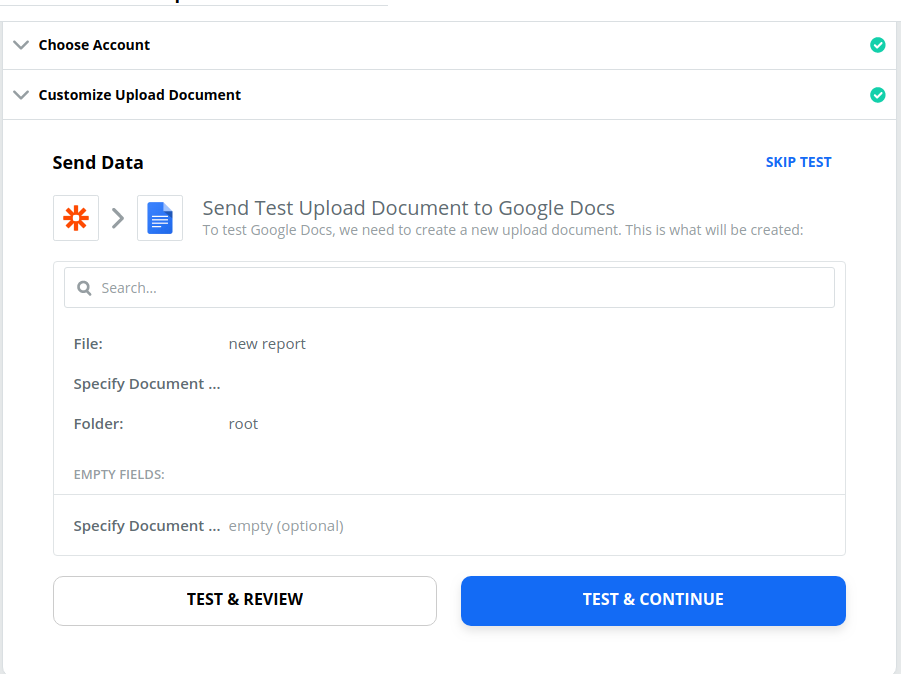
18) To test the connection, click the “Test & Continue” button.
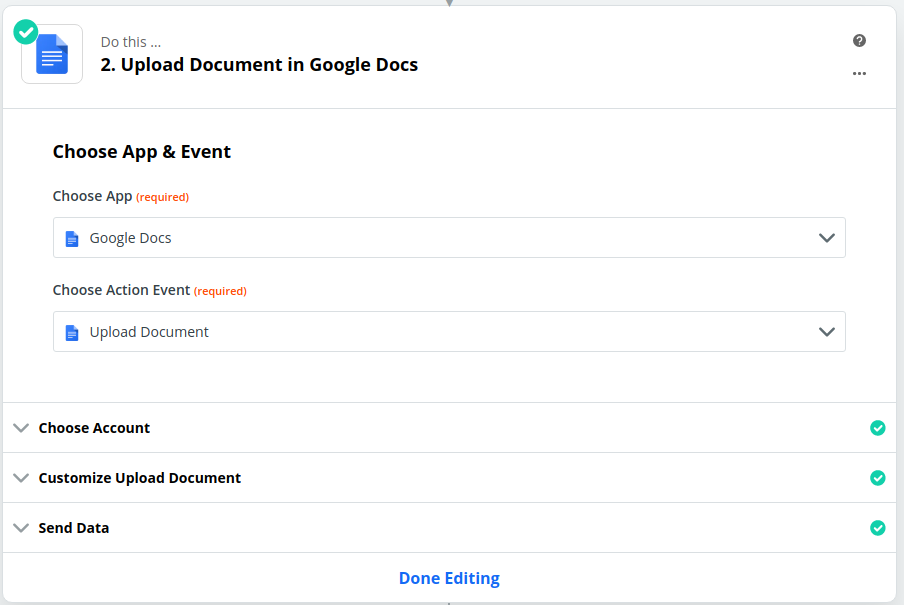
19) All options are successfully configured. Click the “Done Editing” button.
20) Excellent! Now you can automatically download reports to the Zapier service via the Advanced Order Export for WooCommerce plugin. Don’t forget to activate your Zap with Advanced Order Export for WooCommerce using the “On/Off” toggle.

21) After making all the settings, go back to your site. The status of connecting your work to export via the Zapier service has changed!

Also, see step-by-step instructions for adding a “Zap with Advanced Order Export For WooCommerce” account for the “Dropbox” service” at this link.